EN/CNC made seal: Unterschied zwischen den Versionen
Stp (Diskussion | Beiträge) K |
|||
| (4 dazwischenliegende Versionen von einem anderen Benutzer werden nicht angezeigt) | |||
| Zeile 2: | Zeile 2: | ||
|name = CNC Made Seal (en) | |name = CNC Made Seal (en) | ||
|kategorie = Hardware | |kategorie = Hardware | ||
| − | |status = | + | |status = stable |
|autor = [[Benutzer:stp|stp]] | |autor = [[Benutzer:stp|stp]] | ||
|beschreibung = Delicate milling | |beschreibung = Delicate milling | ||
|image = IMGP6820_2_square.JPG | |image = IMGP6820_2_square.JPG | ||
|imagesize = 300 | |imagesize = 300 | ||
| − | |version = 0. | + | |version = 0.9 |
| − | |||
}} | }} | ||
| Zeile 15: | Zeile 14: | ||
== Description == | == Description == | ||
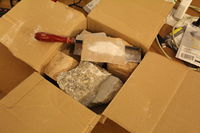
[[Datei:IMG 4217.JPG|thumb|left|200px|Source soapstone material]] | [[Datei:IMG 4217.JPG|thumb|left|200px|Source soapstone material]] | ||
| − | As raw material we use soapstone. Our soapstone specifically sourced | + | As raw material we use soapstone. Our soapstone is specifically sourced to be free from any asbestos. The main machine used for engraving the signet is our CNC machine. We engrave a unique emblem or logo into a prepared piece of soapstone. |
Soapstone is used due to its soft material, which is great for CNC usage, and its resistance to heat, water and sealing wax. This is especially needed during the sealing process involving higher temperatures. | Soapstone is used due to its soft material, which is great for CNC usage, and its resistance to heat, water and sealing wax. This is especially needed during the sealing process involving higher temperatures. | ||
| + | |||
{{clear}} | {{clear}} | ||
| Zeile 22: | Zeile 22: | ||
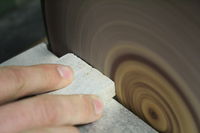
[[Datei:IMG_4222.JPG|thumb|left|200px|Straightening rough/uneven edges]] | [[Datei:IMG_4222.JPG|thumb|left|200px|Straightening rough/uneven edges]] | ||
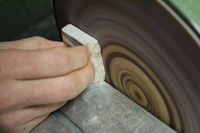
[[Datei:IMG_4220.JPG|thumb|right|200px|Ready to be engraved!]] | [[Datei:IMG_4220.JPG|thumb|right|200px|Ready to be engraved!]] | ||
| − | As a preparatory step we split the | + | As a preparatory step we split the soapstone blocks into smaller plates, which are easier to handle and mount within the CNC machine. |
The soapstone is basically cut from the source material with a wood saw. Rough and uneven edges are grinded and straightened to make handling and mounting easier afterwards. | The soapstone is basically cut from the source material with a wood saw. Rough and uneven edges are grinded and straightened to make handling and mounting easier afterwards. | ||
| Zeile 29: | Zeile 29: | ||
== Milling == | == Milling == | ||
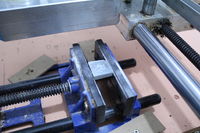
[[Datei:IMG_4224.JPG|thumb|left|200px]] | [[Datei:IMG_4224.JPG|thumb|left|200px]] | ||
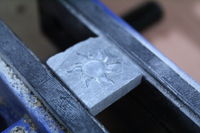
| − | [[Datei: | + | [[Datei:IMG_4227.JPG|thumb|right|200px]] |
| − | [[ | + | The milling itself is not so different to other projects using our [[CNC#Erste_Fr.C3.A4steile|CNC machine]]. |
| + | Engraving too deep will make it easier for the sealing wax to stick and be made into an amulet as you can later see. | ||
| + | Moving too fast or engraving too delicate logos did break edges off in our case. | ||
{{clear}} | {{clear}} | ||
== Postproduction == | == Postproduction == | ||
| − | + | Postproduction of both the following amulet and the signet was done via sand paper and our grinder. Smoothing all edges into a round shape and reducing the thickness. Thicker for the signet as it needs to withstand more force due to sealing. | |
{{clear}} | {{clear}} | ||
== Failure - Amulet == | == Failure - Amulet == | ||
| − | + | The few first sealing tests failed horribly. Either we burned the wax or the wax stuck to never come out again. Instead of wasting the failure items we set out to reuse them. We decided to grind down the front and reduce the excess of wax. Making a nice looking amulet out of it. | |
| − | + | We later discovered the issue was engraving it too deep. | |
| − | |||
| − | |||
| − | |||
| − | |||
| − | |||
| − | |||
{{clear}} | {{clear}} | ||
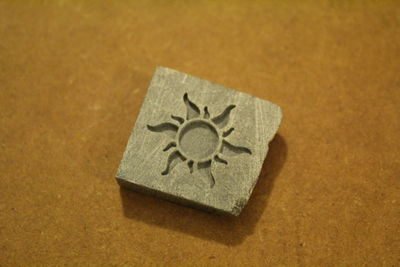
| − | [[Datei:IMG_4235.JPG|thumb| | + | [[Datei:IMG 4229.JPG|thumb|center|400px|Finished engraving \o/]] |
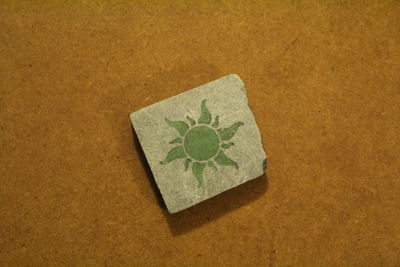
| − | + | [[Datei:IMG_4231.JPG|thumb|center|400px|Filled with hard sealing]] | |
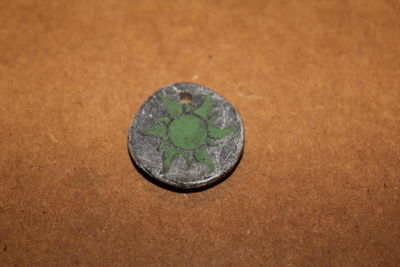
| − | + | [[Datei:IMG_4235.JPG|thumb|center|400px|Sanded down into amulet shape]] | |
{{clear}} | {{clear}} | ||
| Zeile 58: | Zeile 54: | ||
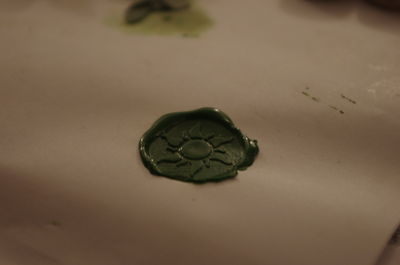
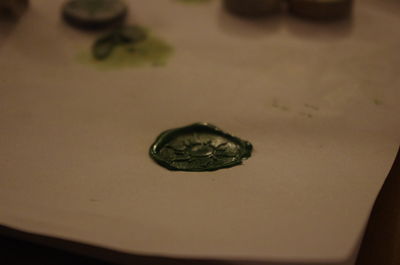
== Success - Seal/Signet == | == Success - Seal/Signet == | ||
| − | [[Datei:IMGP6815.JPG|thumb| | + | [[Datei:IMGP6815.JPG|thumb|center|400px|Sealing works \o/]] |
| − | [[Datei:IMGP6812.JPG|thumb| | + | [[Datei:IMGP6812.JPG|thumb|center|400px|Even more!]] |
{{clear}} | {{clear}} | ||
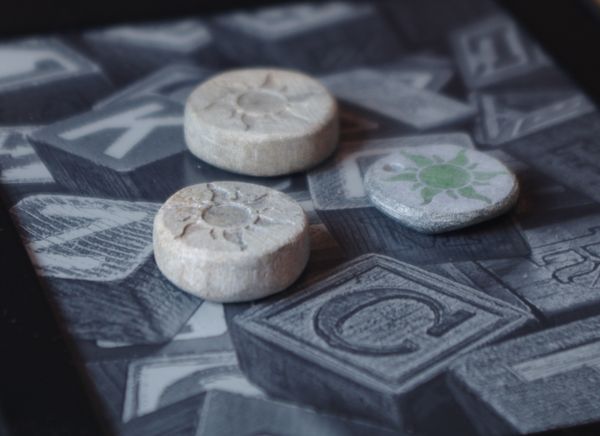
== Last look == | == Last look == | ||
| − | [[Datei:IMGP6820_2.JPG|thumb| | + | [[Datei:IMGP6820_2.JPG|thumb|center|600px]] |
Aktuelle Version vom 25. Februar 2016, 14:48 Uhr
| CNC Made Seal (en) Status: stable | |
|---|---|
| |
| Beschreibung | Delicate milling |
| Autor: | stp |
| Version | 0.9 |
| PayPal | |
Description
As raw material we use soapstone. Our soapstone is specifically sourced to be free from any asbestos. The main machine used for engraving the signet is our CNC machine. We engrave a unique emblem or logo into a prepared piece of soapstone. Soapstone is used due to its soft material, which is great for CNC usage, and its resistance to heat, water and sealing wax. This is especially needed during the sealing process involving higher temperatures.
Preparation
As a preparatory step we split the soapstone blocks into smaller plates, which are easier to handle and mount within the CNC machine. The soapstone is basically cut from the source material with a wood saw. Rough and uneven edges are grinded and straightened to make handling and mounting easier afterwards.
Milling
The milling itself is not so different to other projects using our CNC machine. Engraving too deep will make it easier for the sealing wax to stick and be made into an amulet as you can later see. Moving too fast or engraving too delicate logos did break edges off in our case.
Postproduction
Postproduction of both the following amulet and the signet was done via sand paper and our grinder. Smoothing all edges into a round shape and reducing the thickness. Thicker for the signet as it needs to withstand more force due to sealing.
Failure - Amulet
The few first sealing tests failed horribly. Either we burned the wax or the wax stuck to never come out again. Instead of wasting the failure items we set out to reuse them. We decided to grind down the front and reduce the excess of wax. Making a nice looking amulet out of it. We later discovered the issue was engraving it too deep.

